
Introduction
On the 18th of June, 1815, two men faced-off in a muddy field in Belgium. Wellington, with his British and Allied army, and Napoleon with his French Imperial Guard. One decisive battle could end twenty years of bloody conflict on the continent.
It was a showdown between two of history’s military giants. They were the same age, formidable strategists, with a string of victories behind them. At Waterloo, the outcome hung in the balance and the victor would determine the fate of Europe.
Game Setup
Played between October 2012 – January 2013 and fought using 15mm miniatures using Shako II rule set on a 15 foot table.
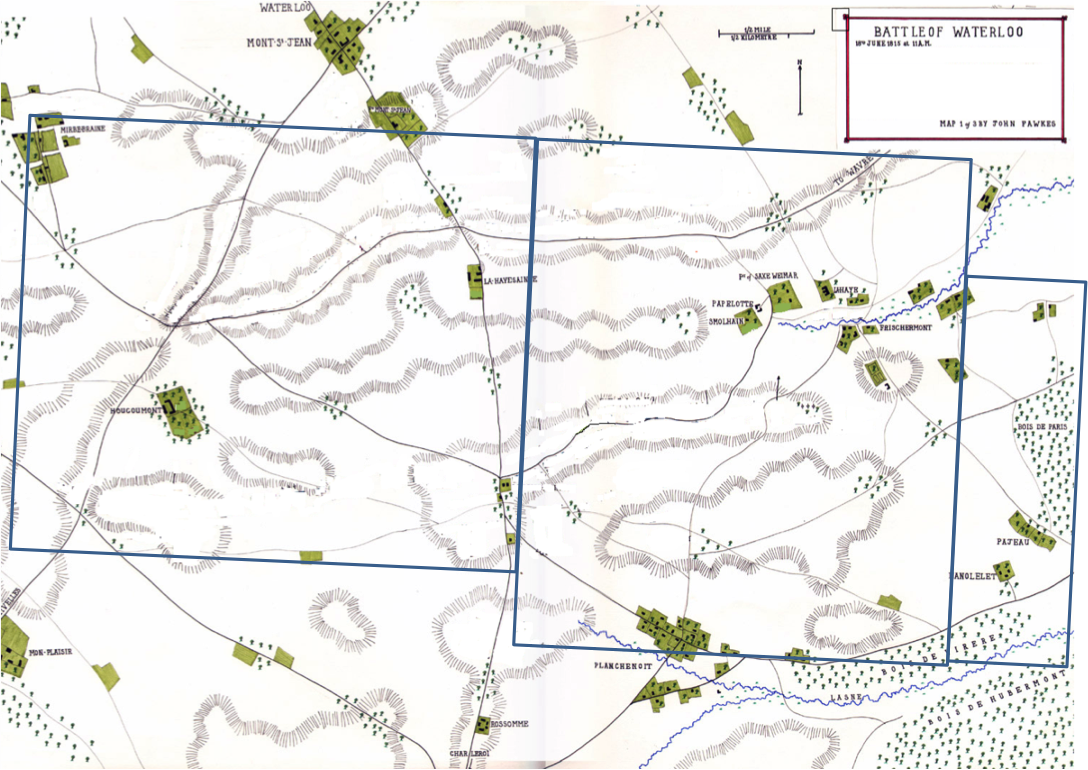
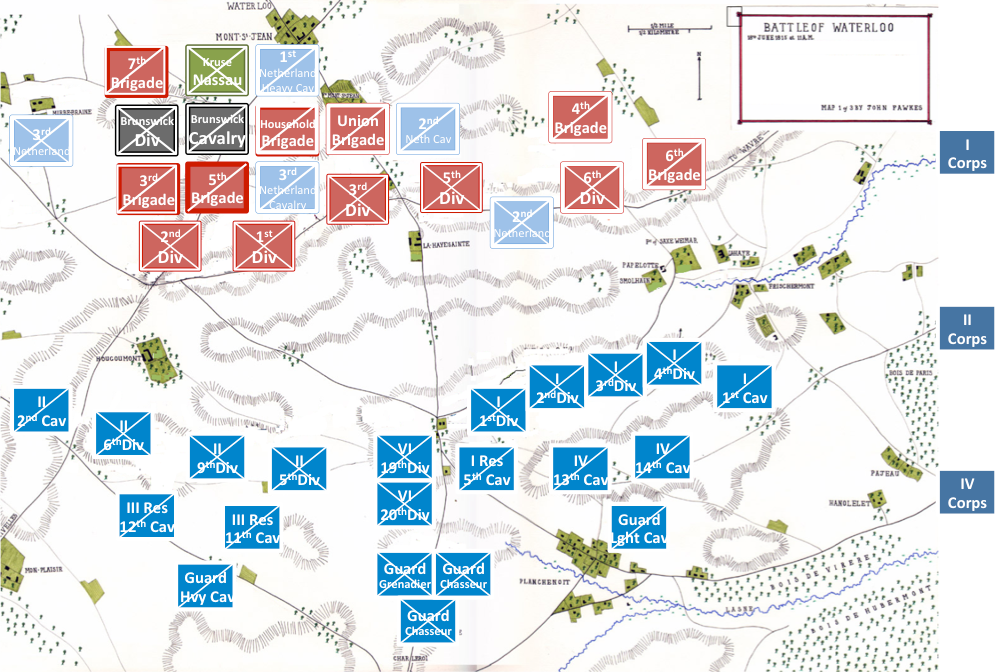
The terrain was modelled on the map below. Every unit that was present at the battle (as best as our research allowed) was represented using the Shako basing system of 9 figures to an infantry battalion, 6 figures to a cavalry regiment and 1 gun model representing a battery. There were about 4000 miniatures used in the game from our own collections. Most battalions are fairly accurately represented in terms of uniform and facings. Orders are given at Division level with Aides being required to deliver orders from the CinC or the Corps Commander. CinC has 3 Aides and each Corps Commander 1.
Order of Battle
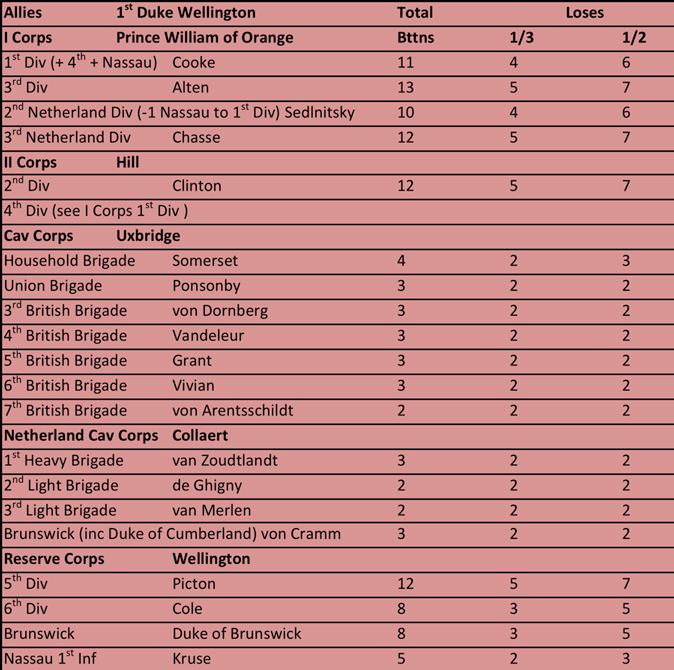
The Allied Army
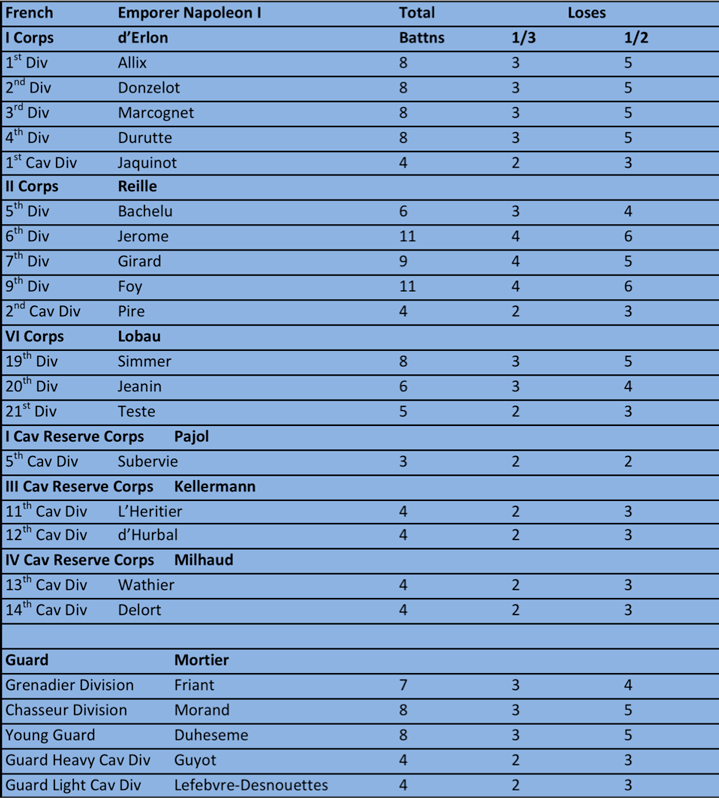
The French Army
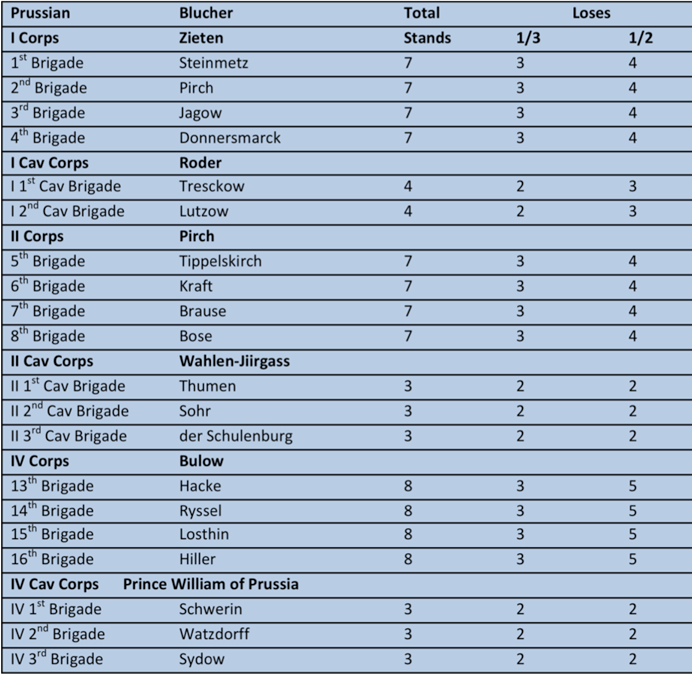
The Prussian Army
The Battle Begins
The two armies were organised and positioned as accurately as possible to their historical situation.
The game started at 11am using 15 minute turns. The Prussians would arrive randomly on the east edge of the board. Prussian IV Corps would start to arrive at 1pm, I Corps at 2pm and II Corps at 3pm.

View of battlefield starting positions from the east. The French are positioned along the ridge line on the left and the Allies on the right. Frischermont is at the bottom right, with Papelotte just above. La Haye Sainte is towards the top centre of the picture with La Belle Alliance opposite on the left. Hougoumont is at the far top of the picture.
 The opposite view from the west with Hougoumont in the foreground. The Allies stretch out along the crest on the left and the massed French on the right. The farmhouse of La Hate Saint is centre left. La Belle Alliance is hidden behind the trees centre right.
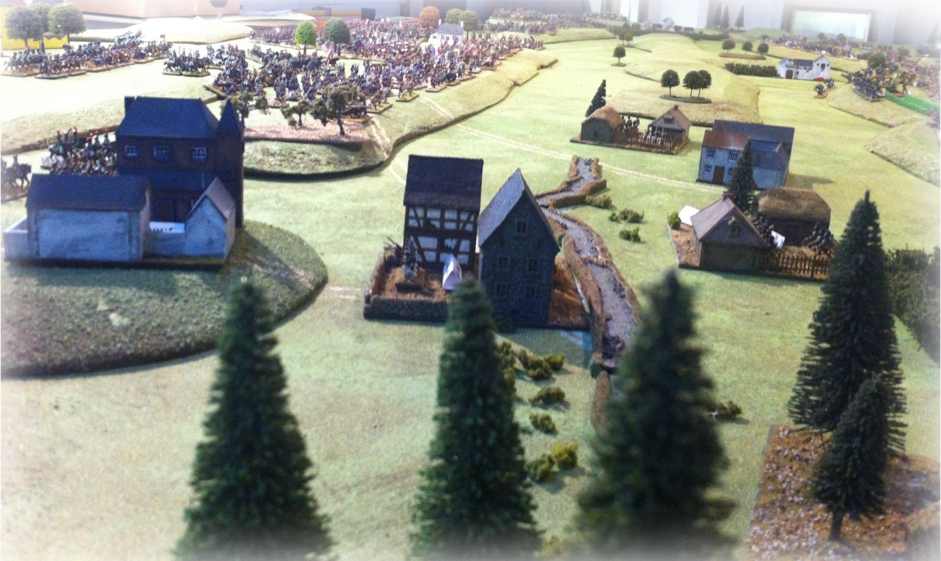
The French I Corps as seen from the Frischermont Chateau on the hill and the villages of Smohain, La Haye and Papelotte. These villages form the far left of the Allied position. The River Ohain was swollen by rain over the preceding days.
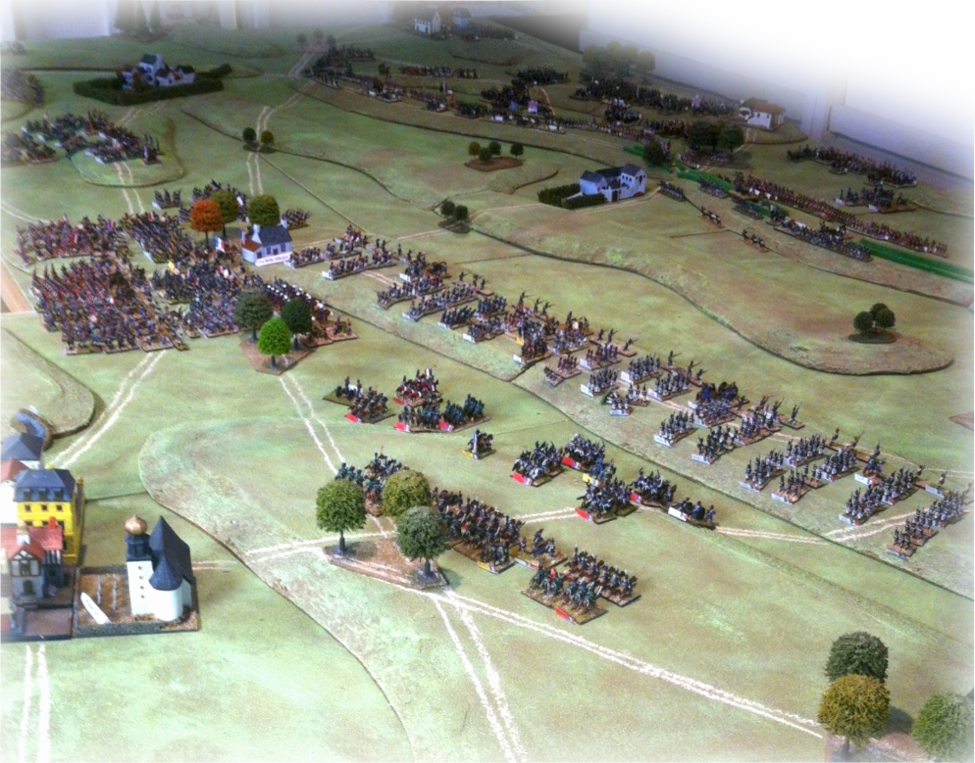 This picture shows the town of Plancenoit behind the French right. The right wing of the French army consisting of d’Erlon’s I Corps stretched across the ridge supported by Kellermanns III Cavalry Reserve Corps and Milhauds IV Cavalry Corps. VI Corps and the Guard are visible as the mass of troops positioned behind La Belle Alliance.
 Napoleon is positioned next to La Belle Alliance with Lobau’s VI Corps and the massed ranks of his guard positioned behind them. Le Haye Saint is visible in the distance with the Allied lines stretching out to either side.
 French view of Hougoumont on their left flank. General Reille commanding the II Corps (on the far left of the picture) orders the advance. General L’Heritiers elite heavy cavalry provide support, Dragoons in front the famous Cuirassiers behind.
Note that the red ident on the back of the Cuirassiers stands are red. This signifies an MR of 5/2 rather than the usual 6/2. We downgraded a lot of the French heavy cavalry as it wasn’t as well mounted as it had been at its pomp (prior to The Russian Campaign). The French cavalry was still a very impressive force and totally outclassed the mostly light cavalry on the Allied side.

Wellington’s view of the Allied left. Wellington is positioned in the bottom right corner just behind La Haye Saint. Lieutenant General Sir Thomas Picton is in the centre of the picture commanding the 5th Division. The 1st Battalion 95th Rifles can be seen on the right flank of the line behind the crest line with the Cameron Highlanders to their left. The 2nd Netherland Division started the game in front of the crest line.
 Wellington’s view of the right side of the battlefield. Wellington is positioned sitting on Copenhagen with his staff under the elm tree.
